Have you ever made a pumpkin arrangement for Thanksgiving or Halloween? You know, the type where you hollow out the pumpkin in order to use it as a temporary planter or even to hold a floral arrangement in a block of Oasis foam. How long did it really last? Two or three days?
What if I told you that you can create a beautiful pumpkin decorated with succulent cuttings or dried flowers with no carving involved? One that will last for weeks on end, starting with the Thanksgiving table and carrying right through to Halloween and beyond. Well, today I am going to show you how to do this step by step, with the help of someone who has been making them for years — my friend and co-worker Teresa.
Step 1: Choose a Pumpkin
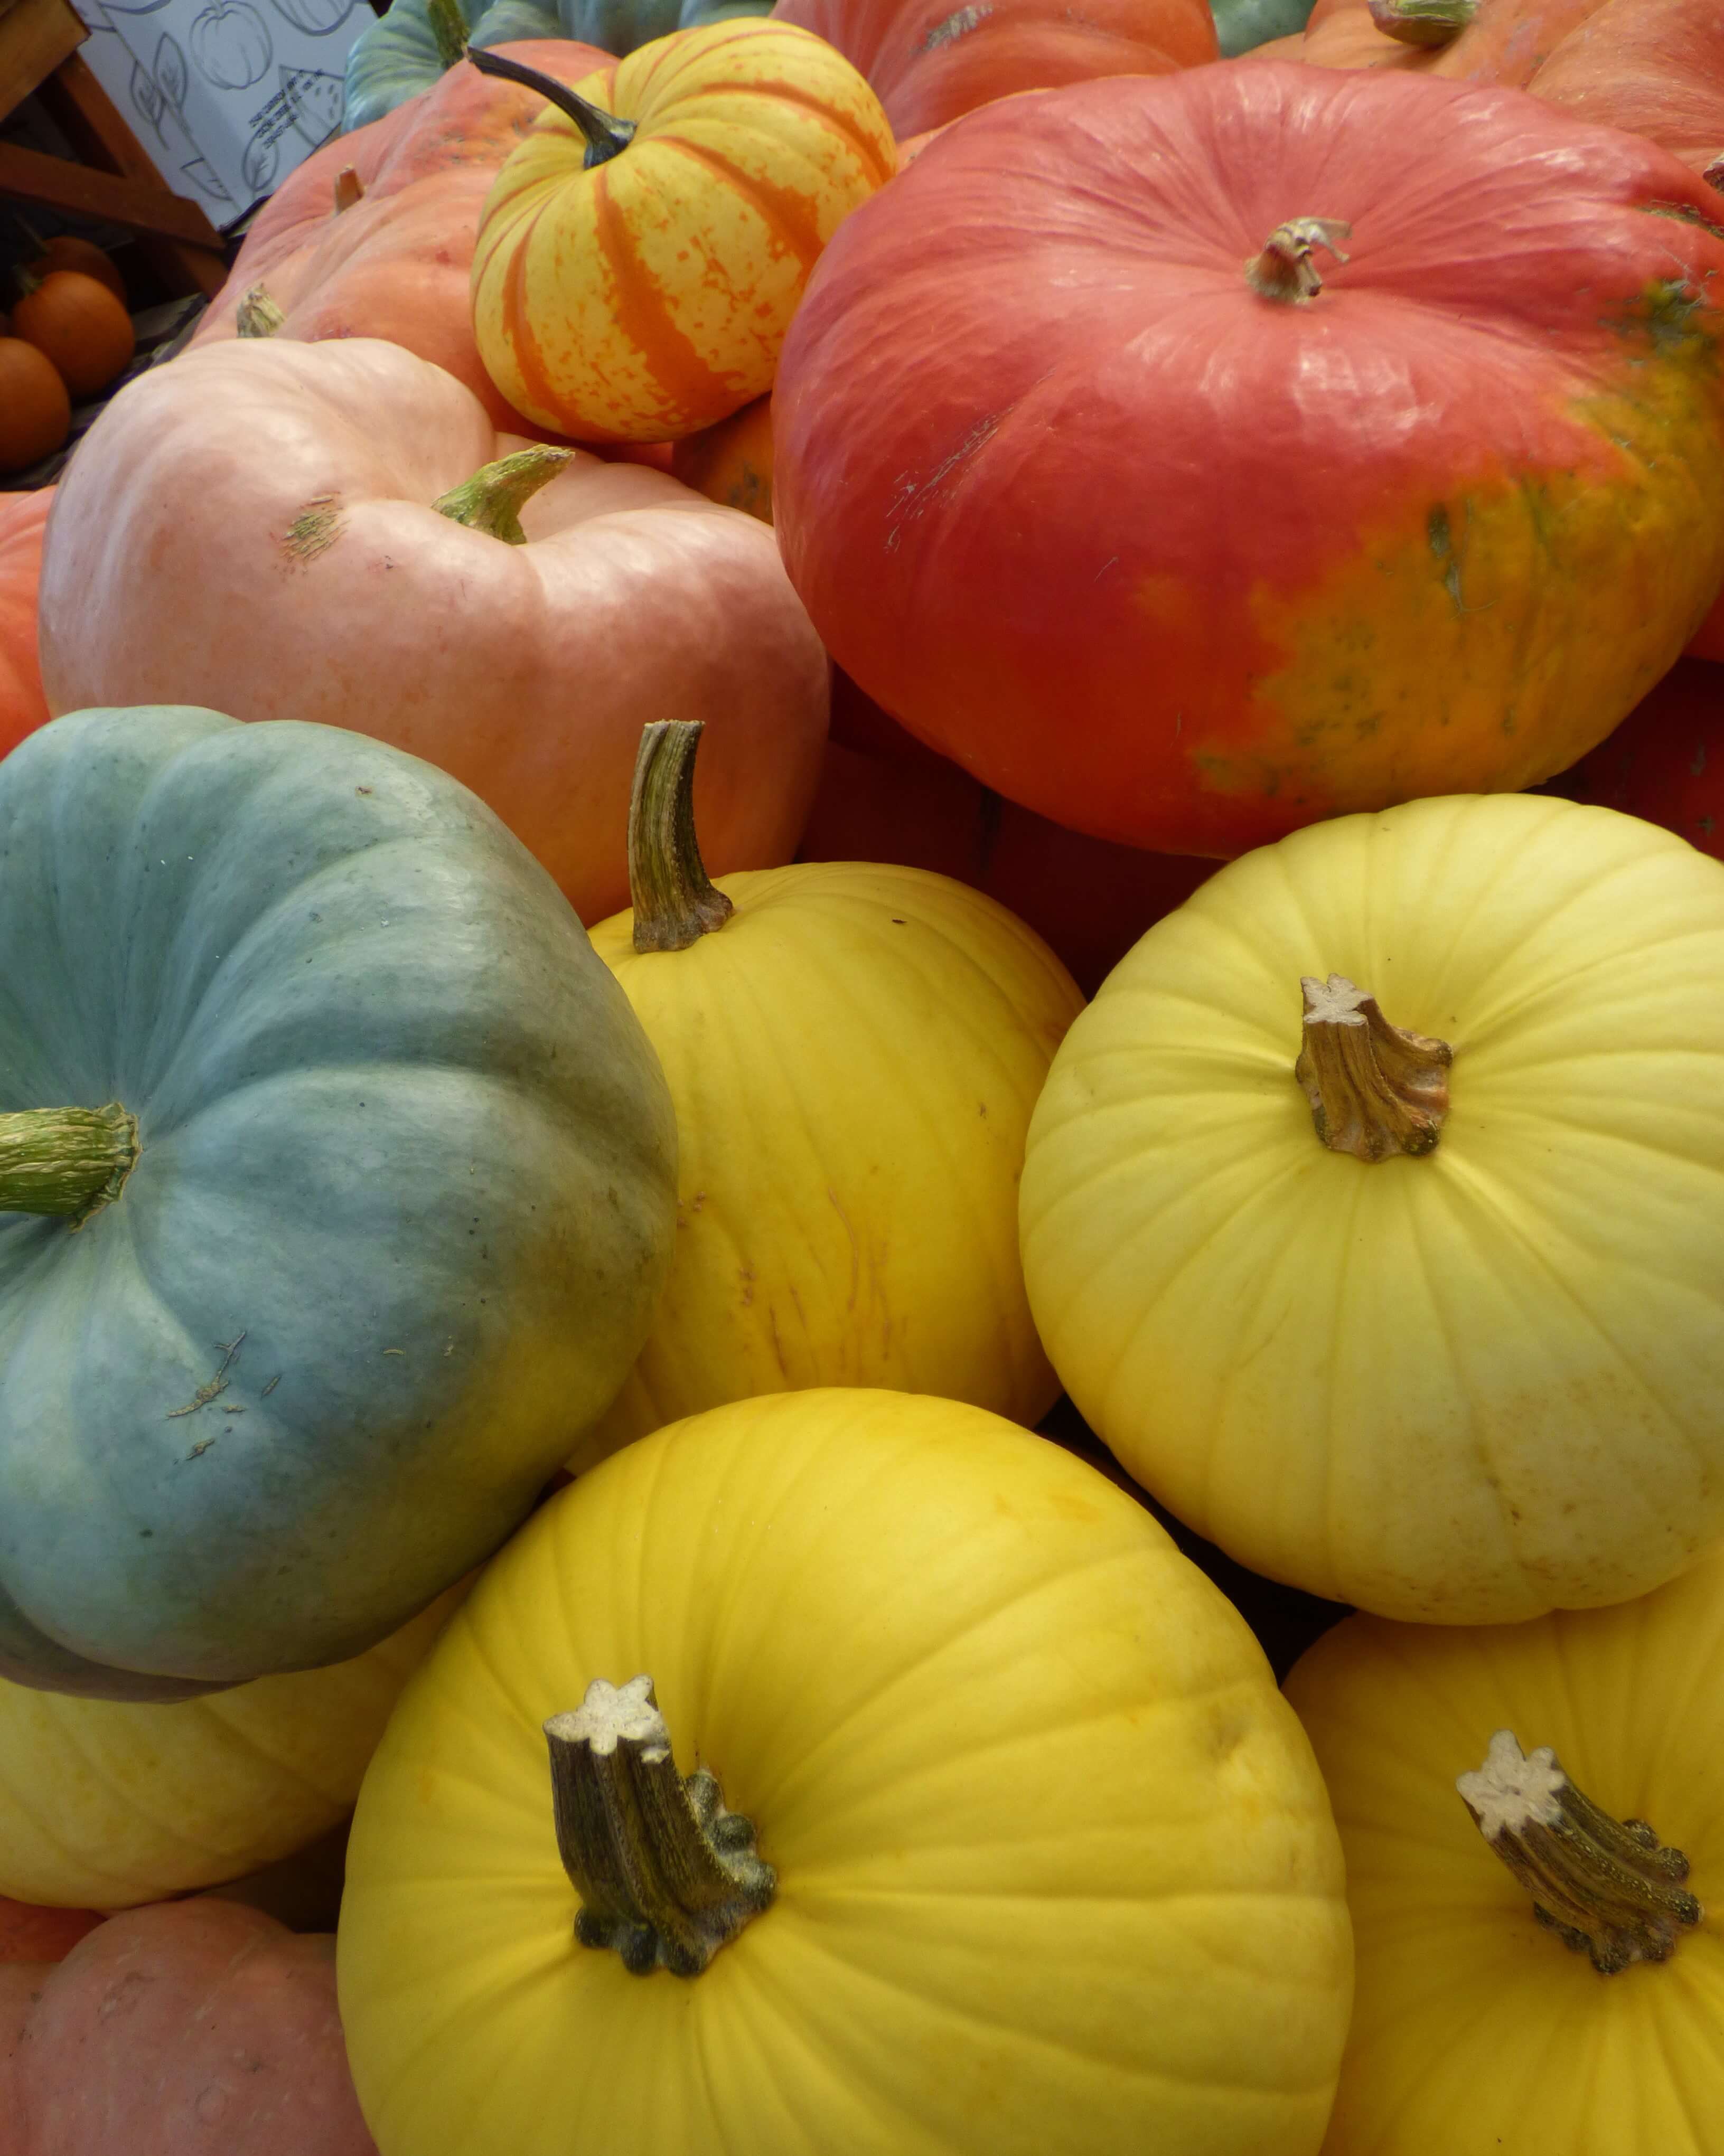
Now is not the time to be boring as pumpkins come in a dazzling array of colours, including yellow, pink, white, buff, red, striped, green, and of course, the traditional deep orange — one of which is bound to match your décor. One tip here is to pick one without any bruising, as this will decrease the shelf life of your display. Also, be sure to wipe it down before starting in order to remove any residual mud or leaf debris.
Step 2: Assemble Your Tools
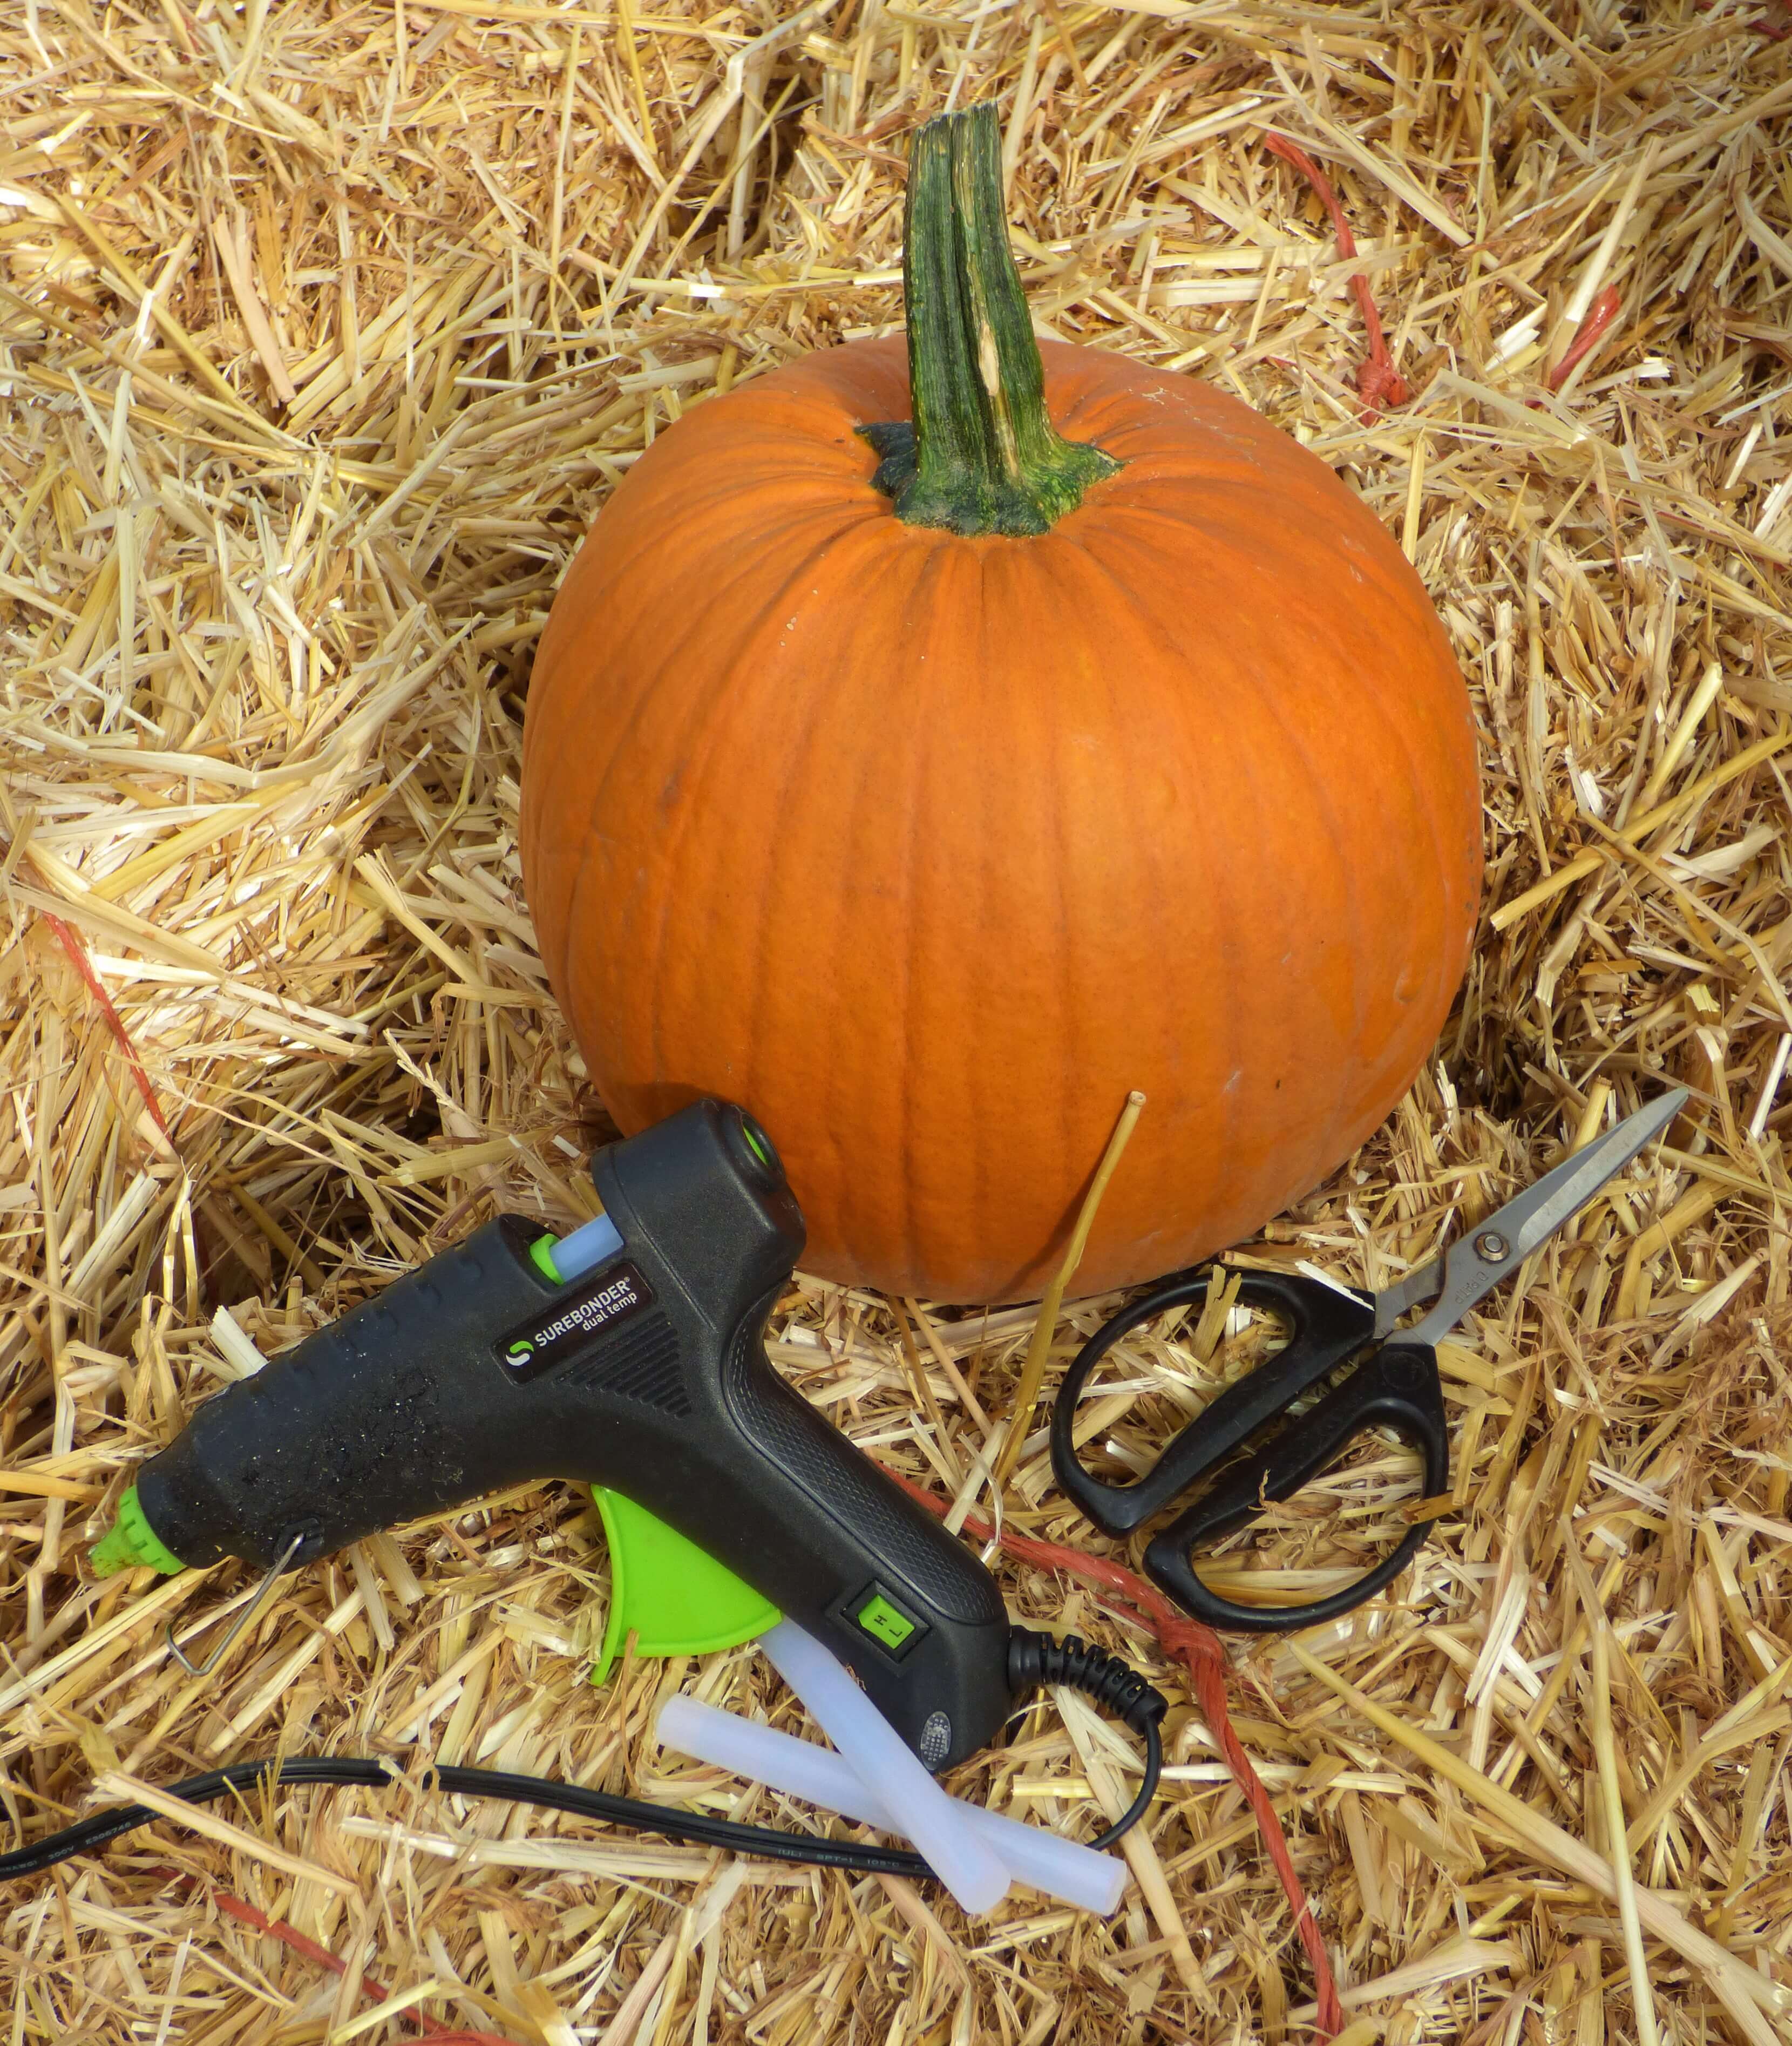
This is a relatively simple task, as all you are going to need is a glue gun (and possibly a short electrical extension cord), extra glue sticks, and some floral scissors.
Step 3: Gather Your Applique Décor
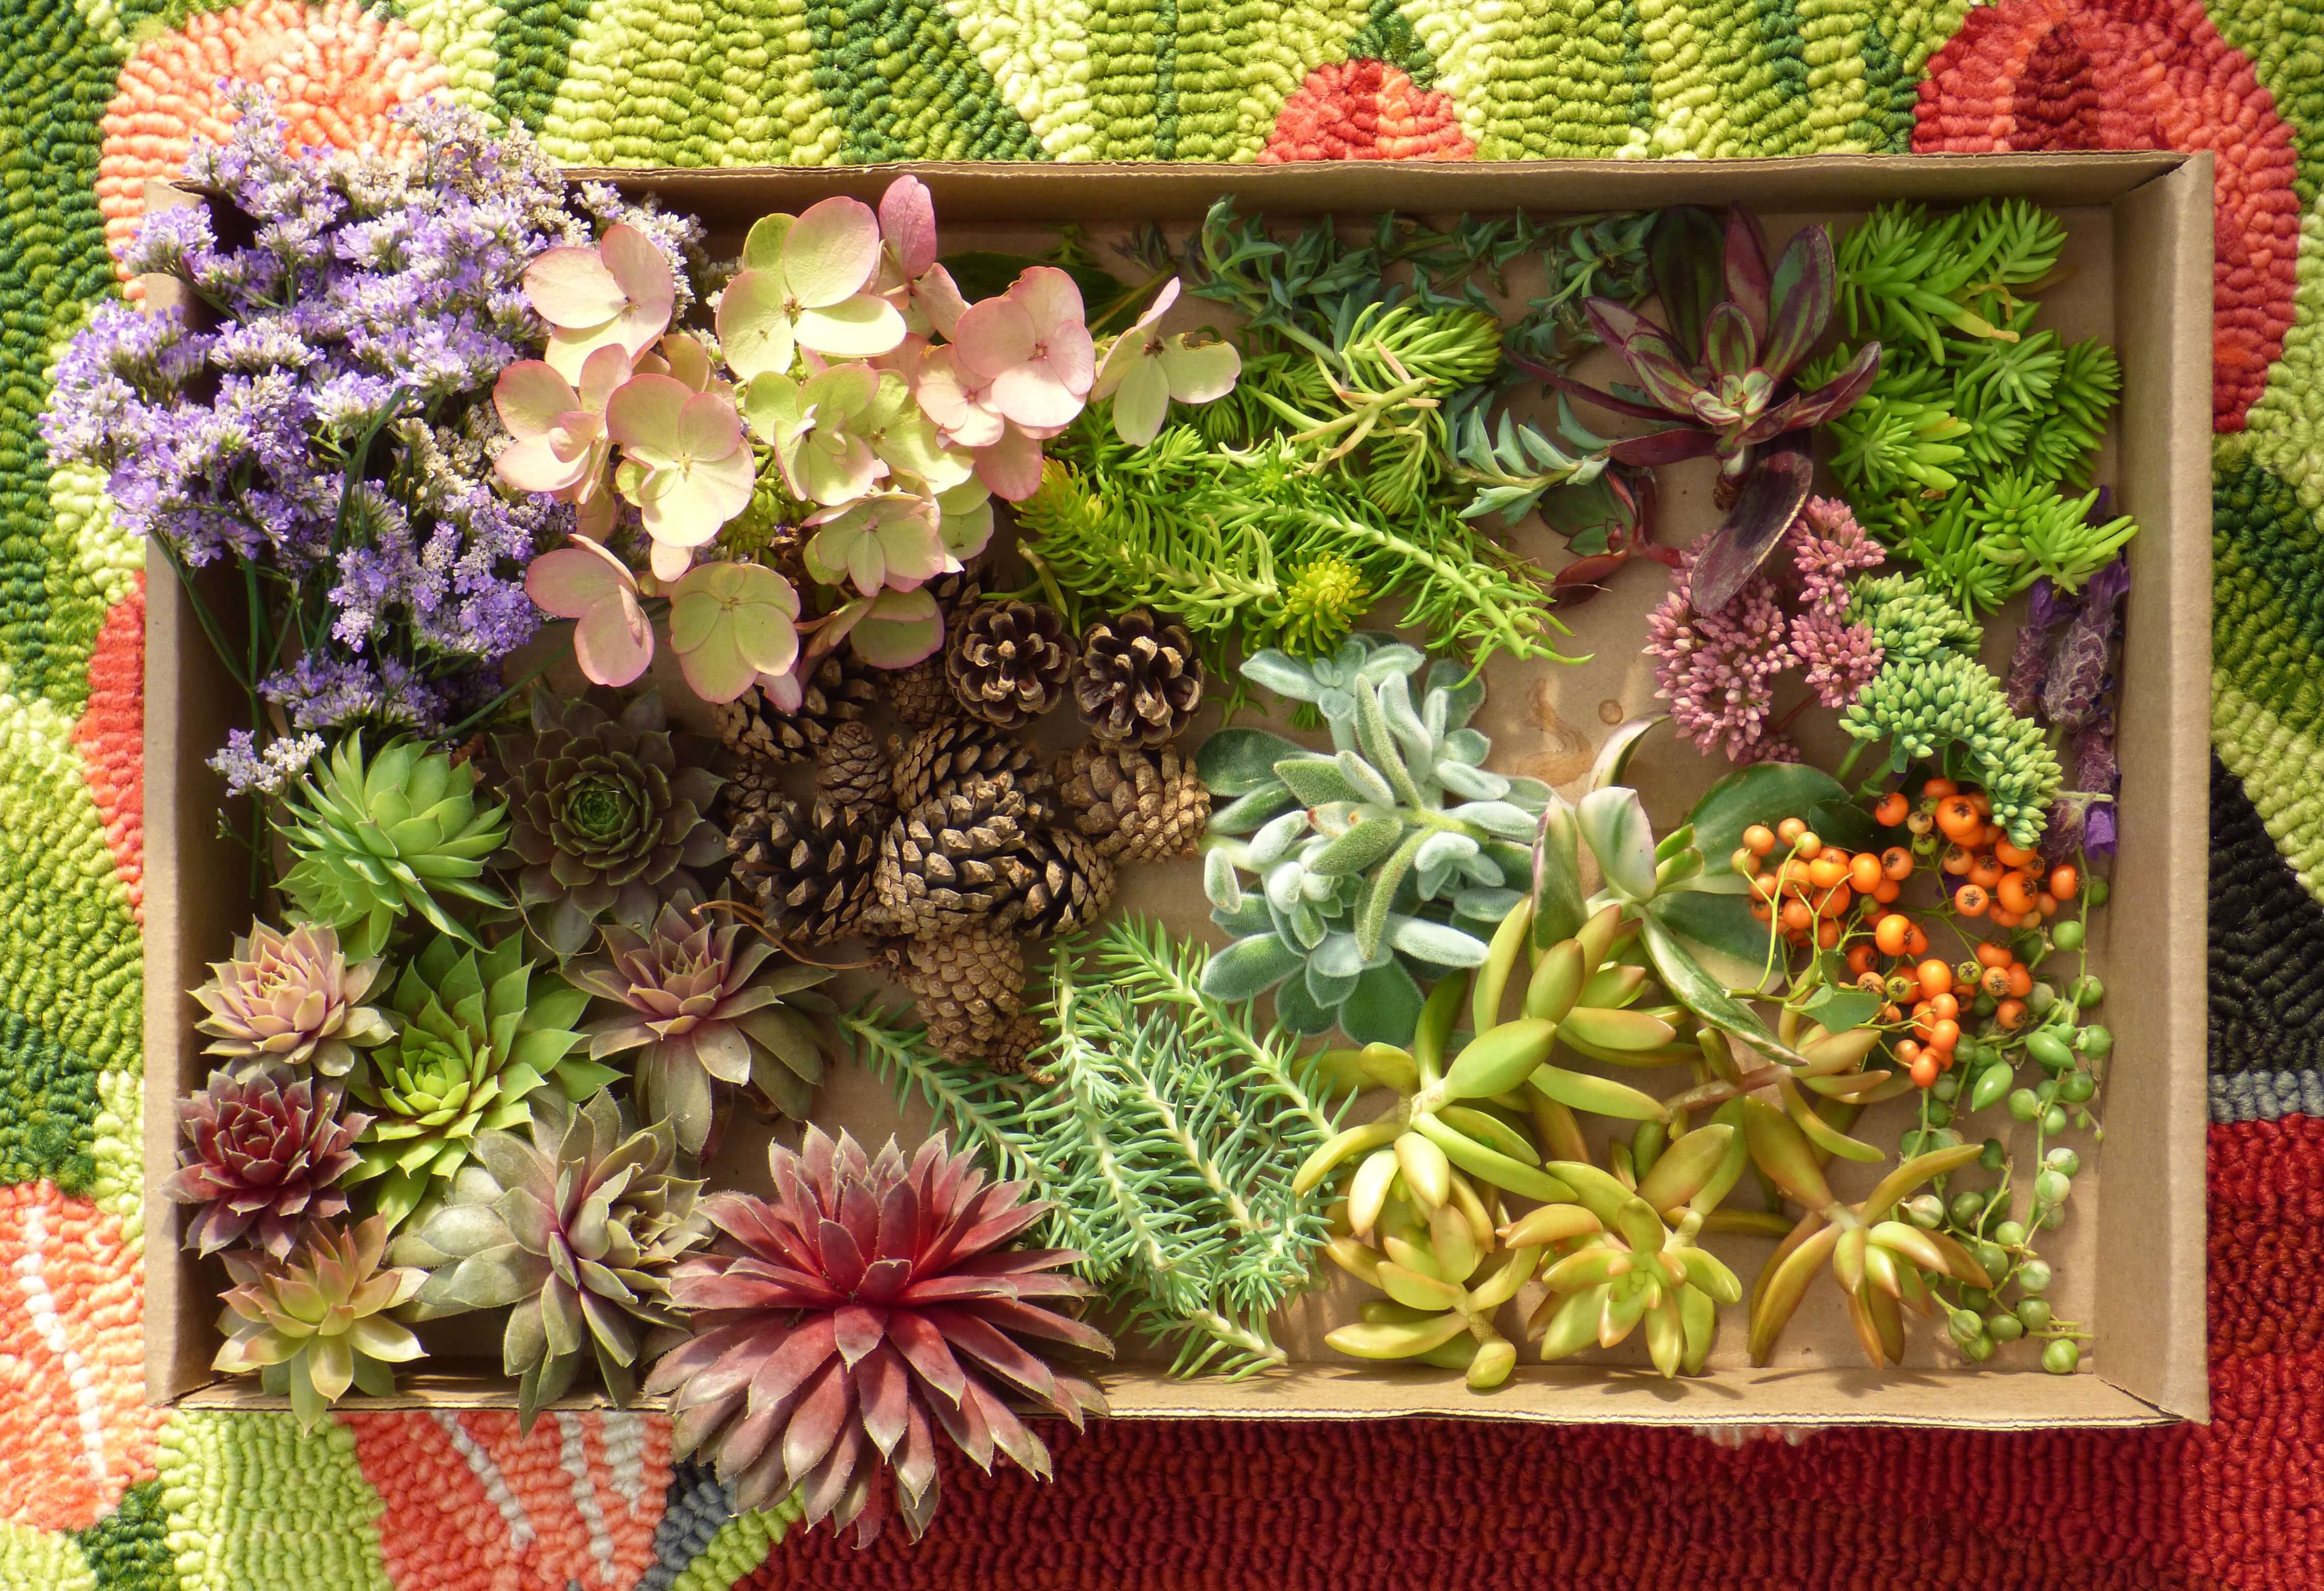
Teresa strongly suggests using offsets from Hens & Chicks (Sempervivum), leaf or branch cuttings from any brightly coloured succulents (such as Sedum & Echeveria), as well as dried hydrangea florets, small pine cones, berries, and even Statice. The reason for this specificity is that these are the natural décor choices that have a good shelf life. Other common selections such as autumn leaves or fern fronds are fine for shorter periods of time, but they tend to dry and discolor very quickly. Also, have a good selection on hand so that you have enough variety to create an interesting display.
Step 4: Get Your Workplace Ready
Use a work surface that won’t be harmed by the inevitable dripping hot glue (or put some newspaper down), then plug in the glue gun to warm it up. You are also going to need an empty plastic pot to place the pumpkin on and use as a work pedestal. This brings the project closer to eye level and makes the designing process a lot easier.
Step 5: Start Around the Pumpkin's Stem
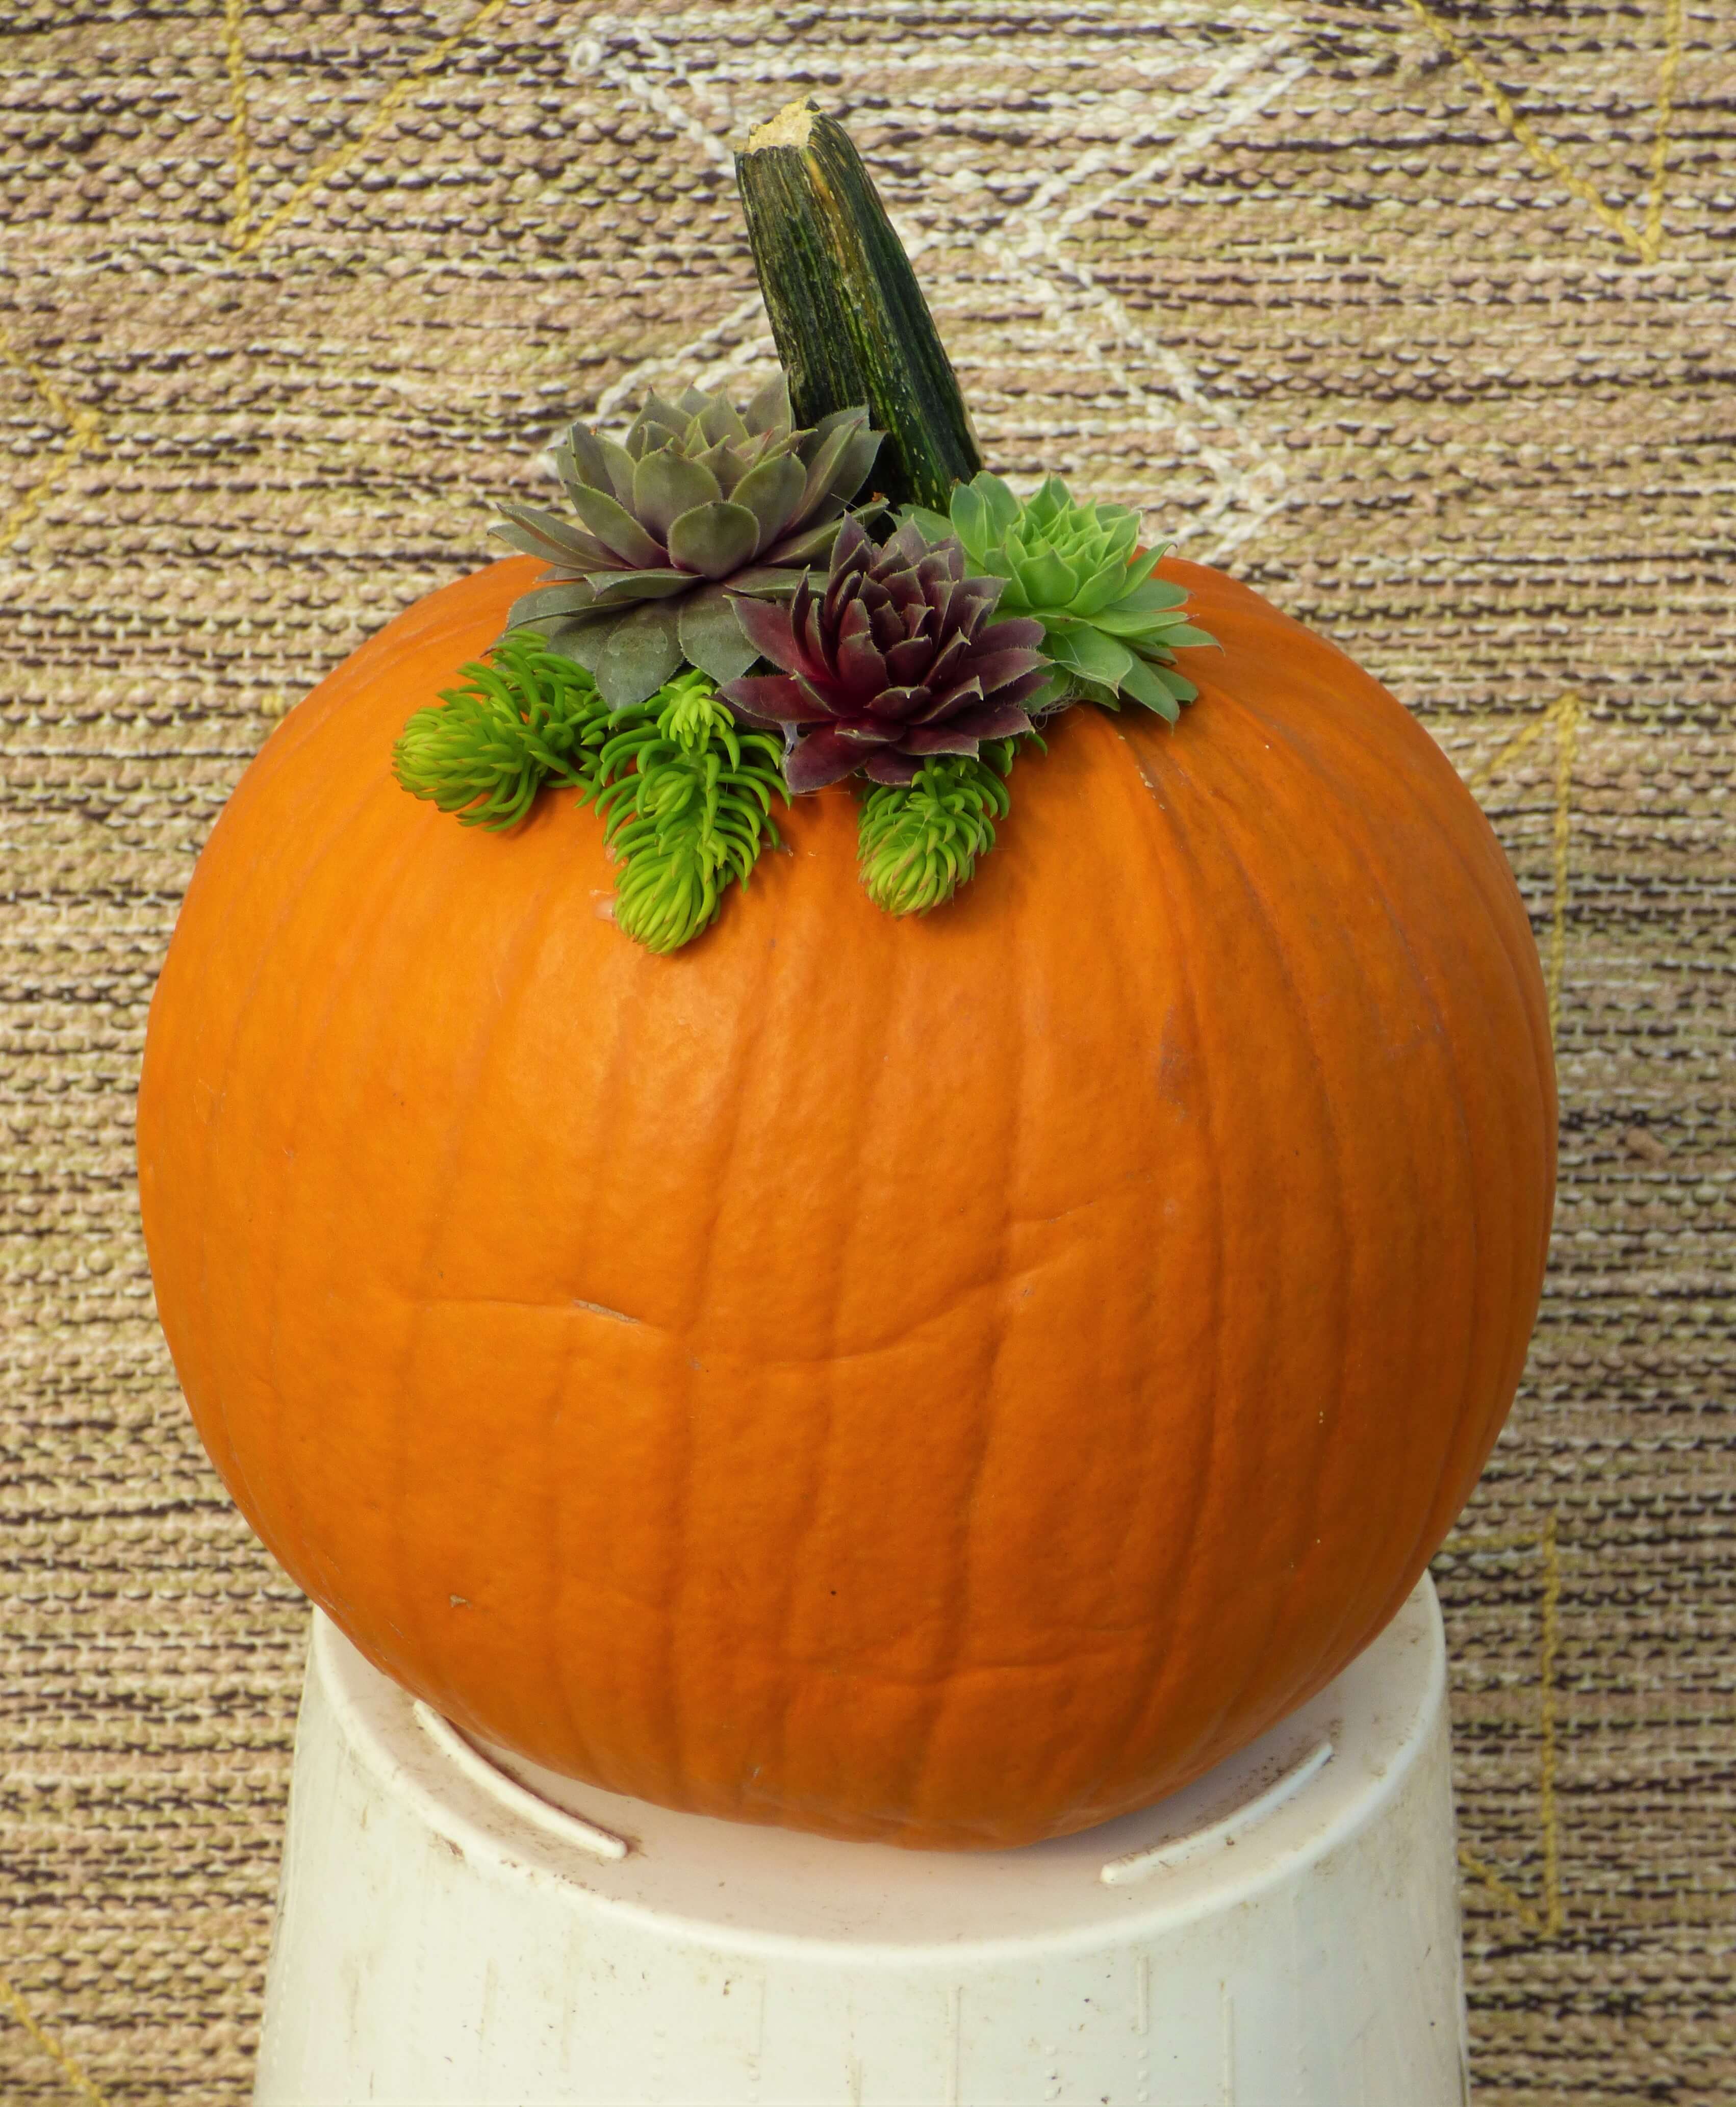
Most of your work is going to be focused around the stem of the pumpkin, so start by choosing cuttings or flowers that complement or contrast the colour of the base. Here, Teresa has chosen some large rosettes of burgundy, olive, and lime green Sempervivum overtop an accent of chartreuse Sedum ‘Angelina’ stems. In order for it to look natural, the ‘Angelina’ stems need to be tucked underneath the Sempervivum, so be sure to leave a gap around the edges to accommodate this.
Step 6: Work Your Way Around the Top
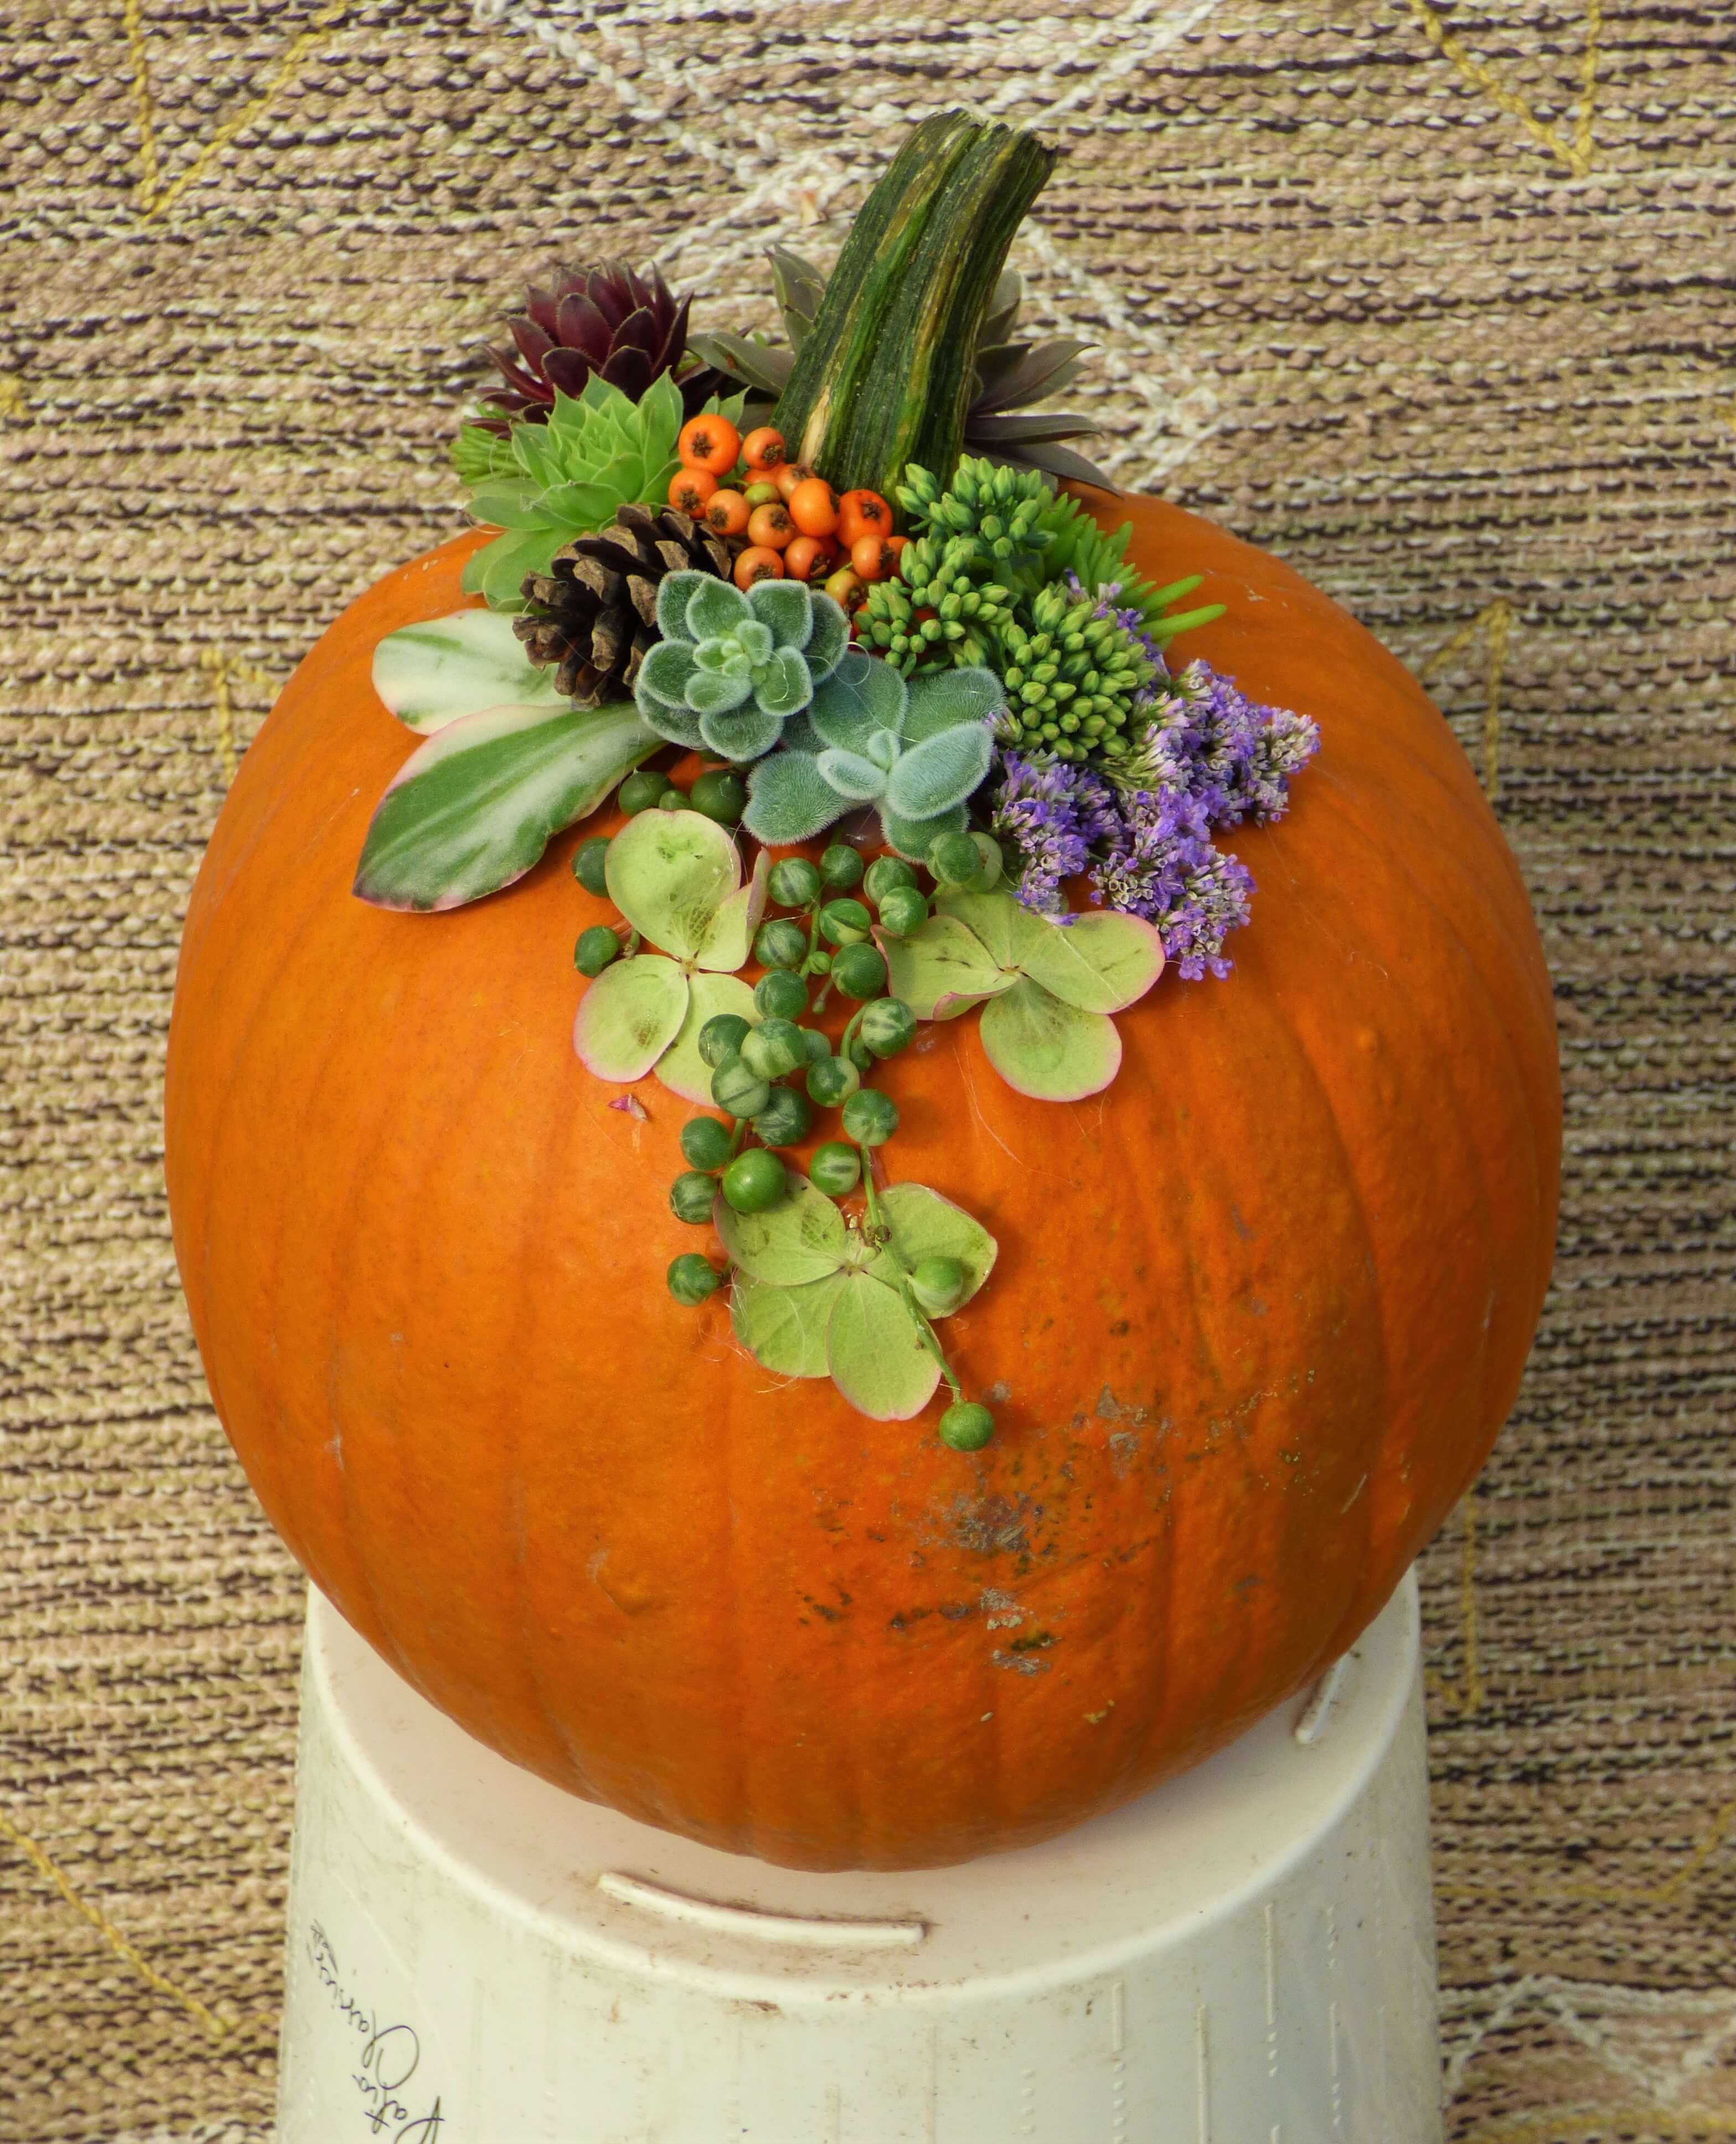
Once one face is completed you are going to want to turn the pumpkin on its pedestal to work an adjacent surface. Don’t be afraid to change things up, because every side of the pumpkin is a slightly different view. Here, Teresa has transitioned into an eclectic display of textures and colours, including orange Pyracantha berries, fuzzy Echeveria rosettes, unopened Sedum spectabile flower clusters, and some purple Statice. Trailing below them are a strand of variegated String-of-Pearls and some dried Hydrangea paniculata florets. Just remember to tuck the trailers just under the main features near the stem.
Step 7: Complete the Display All the Way Around
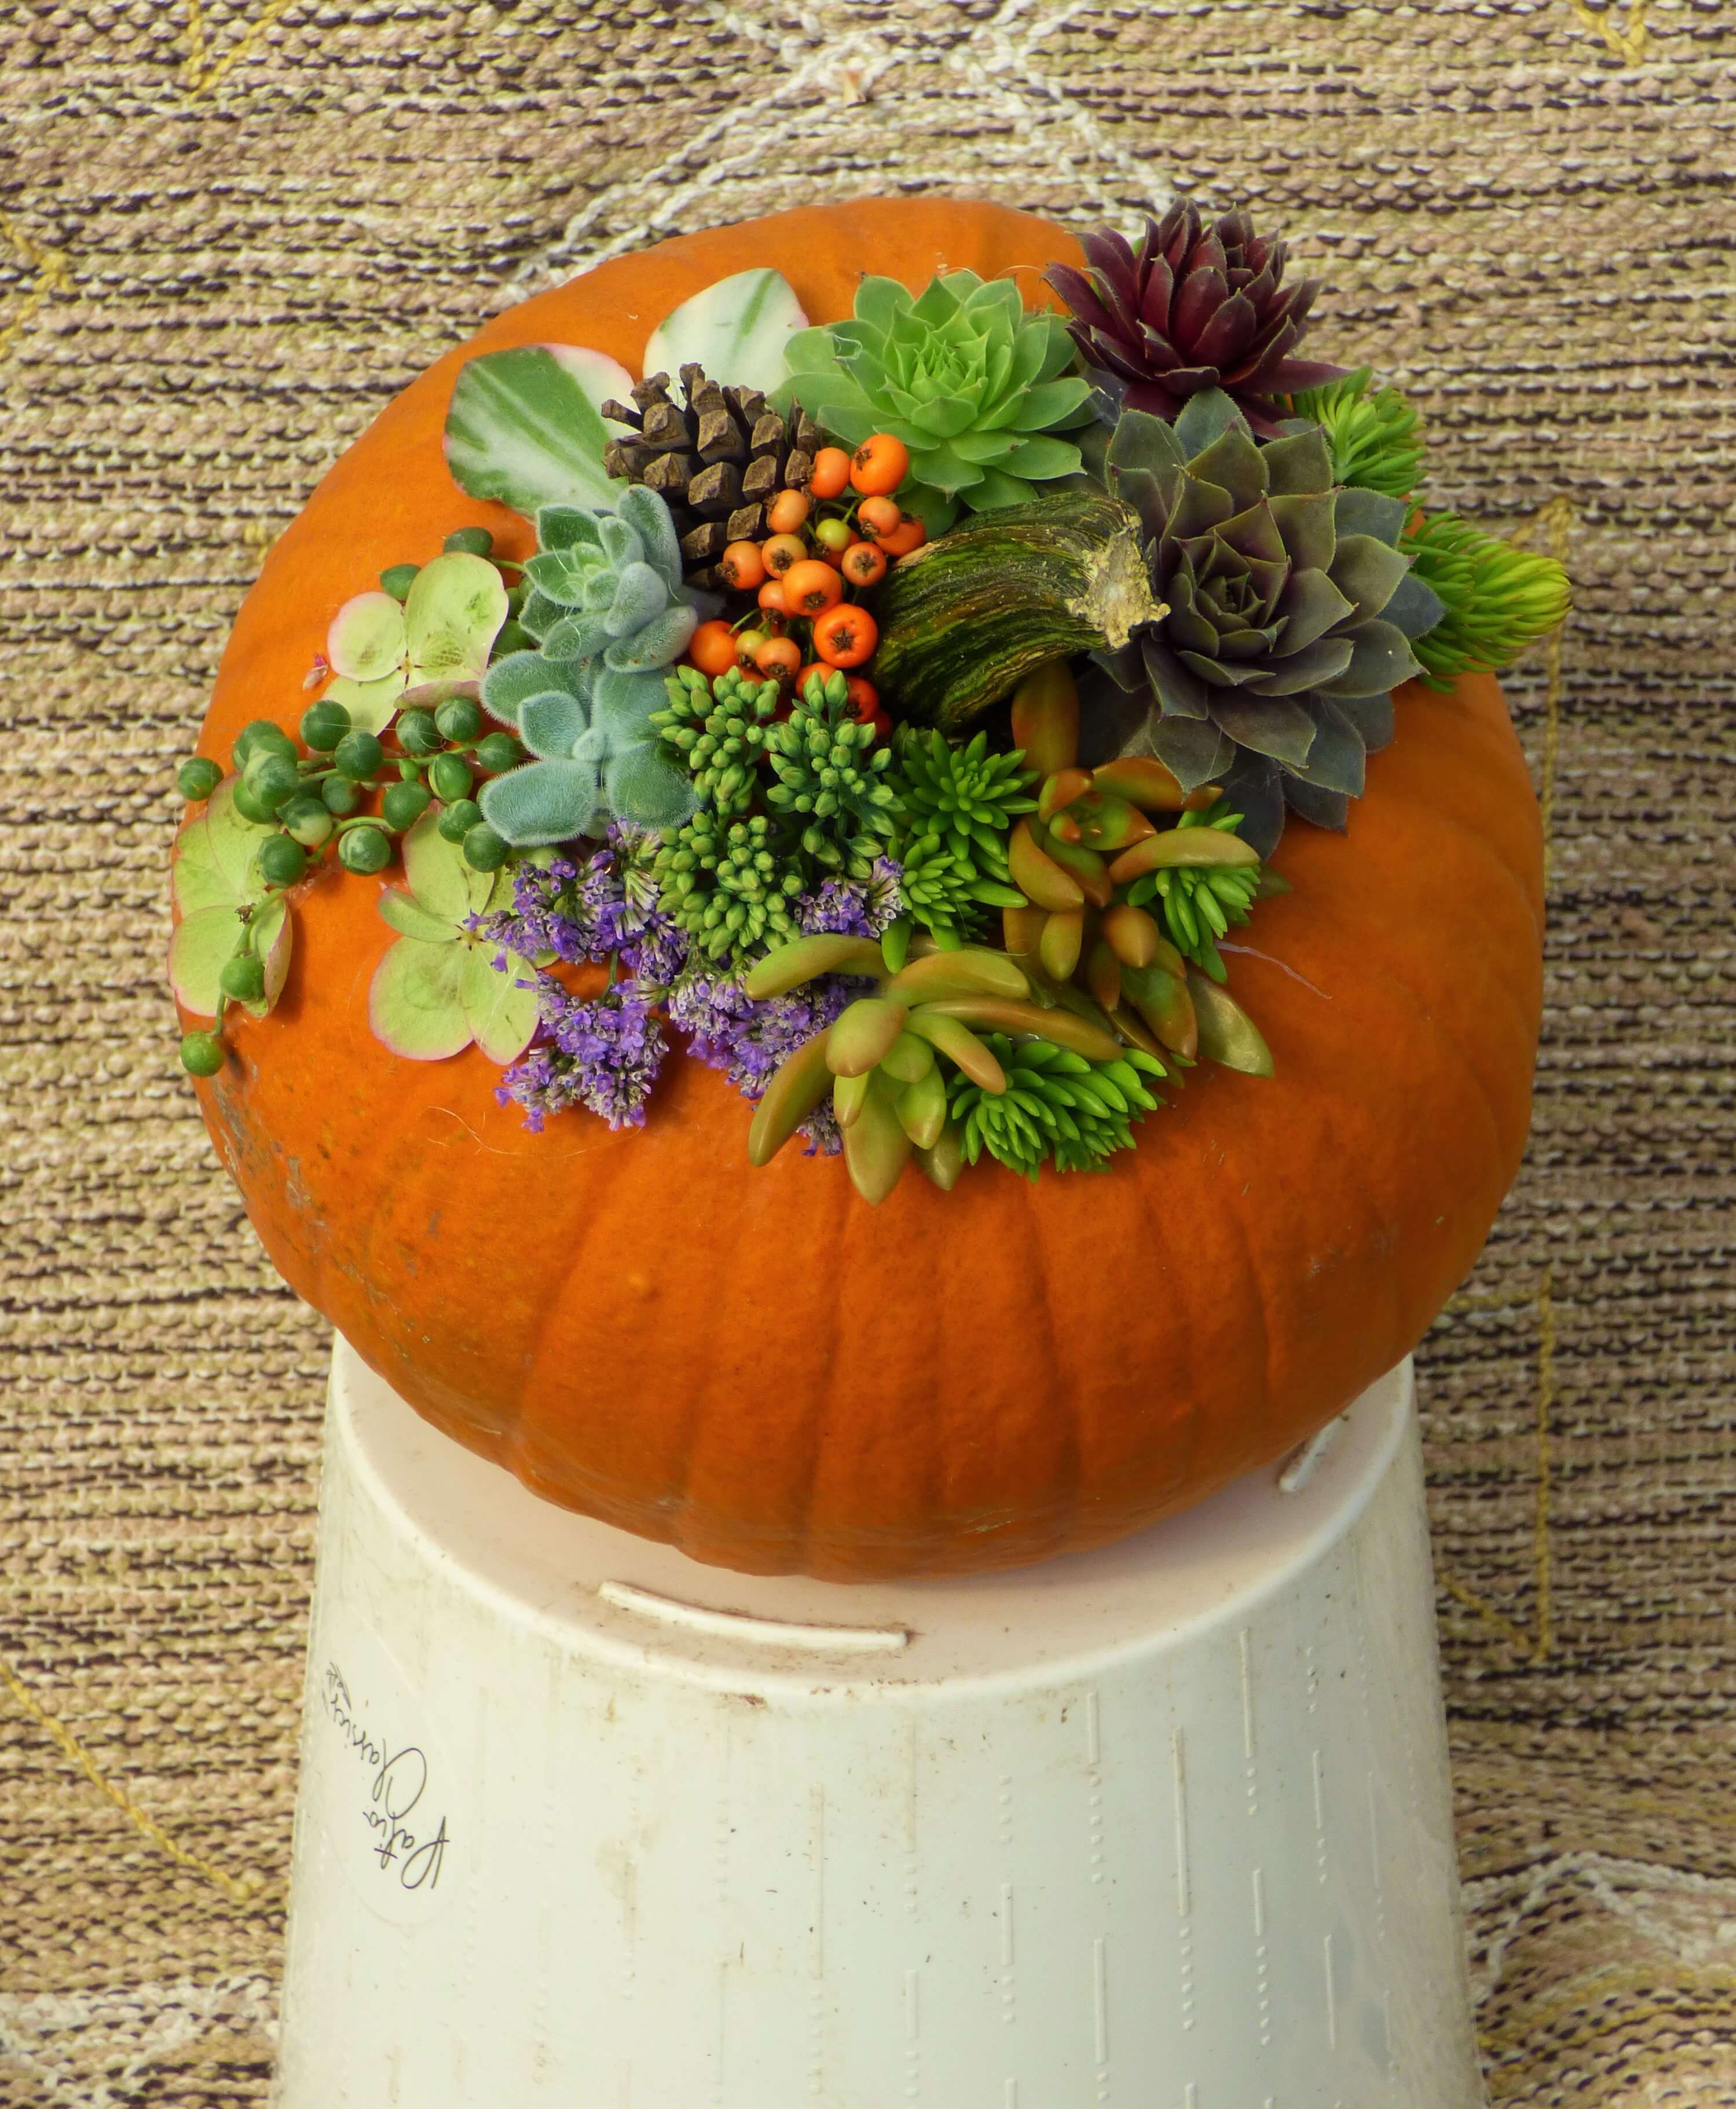
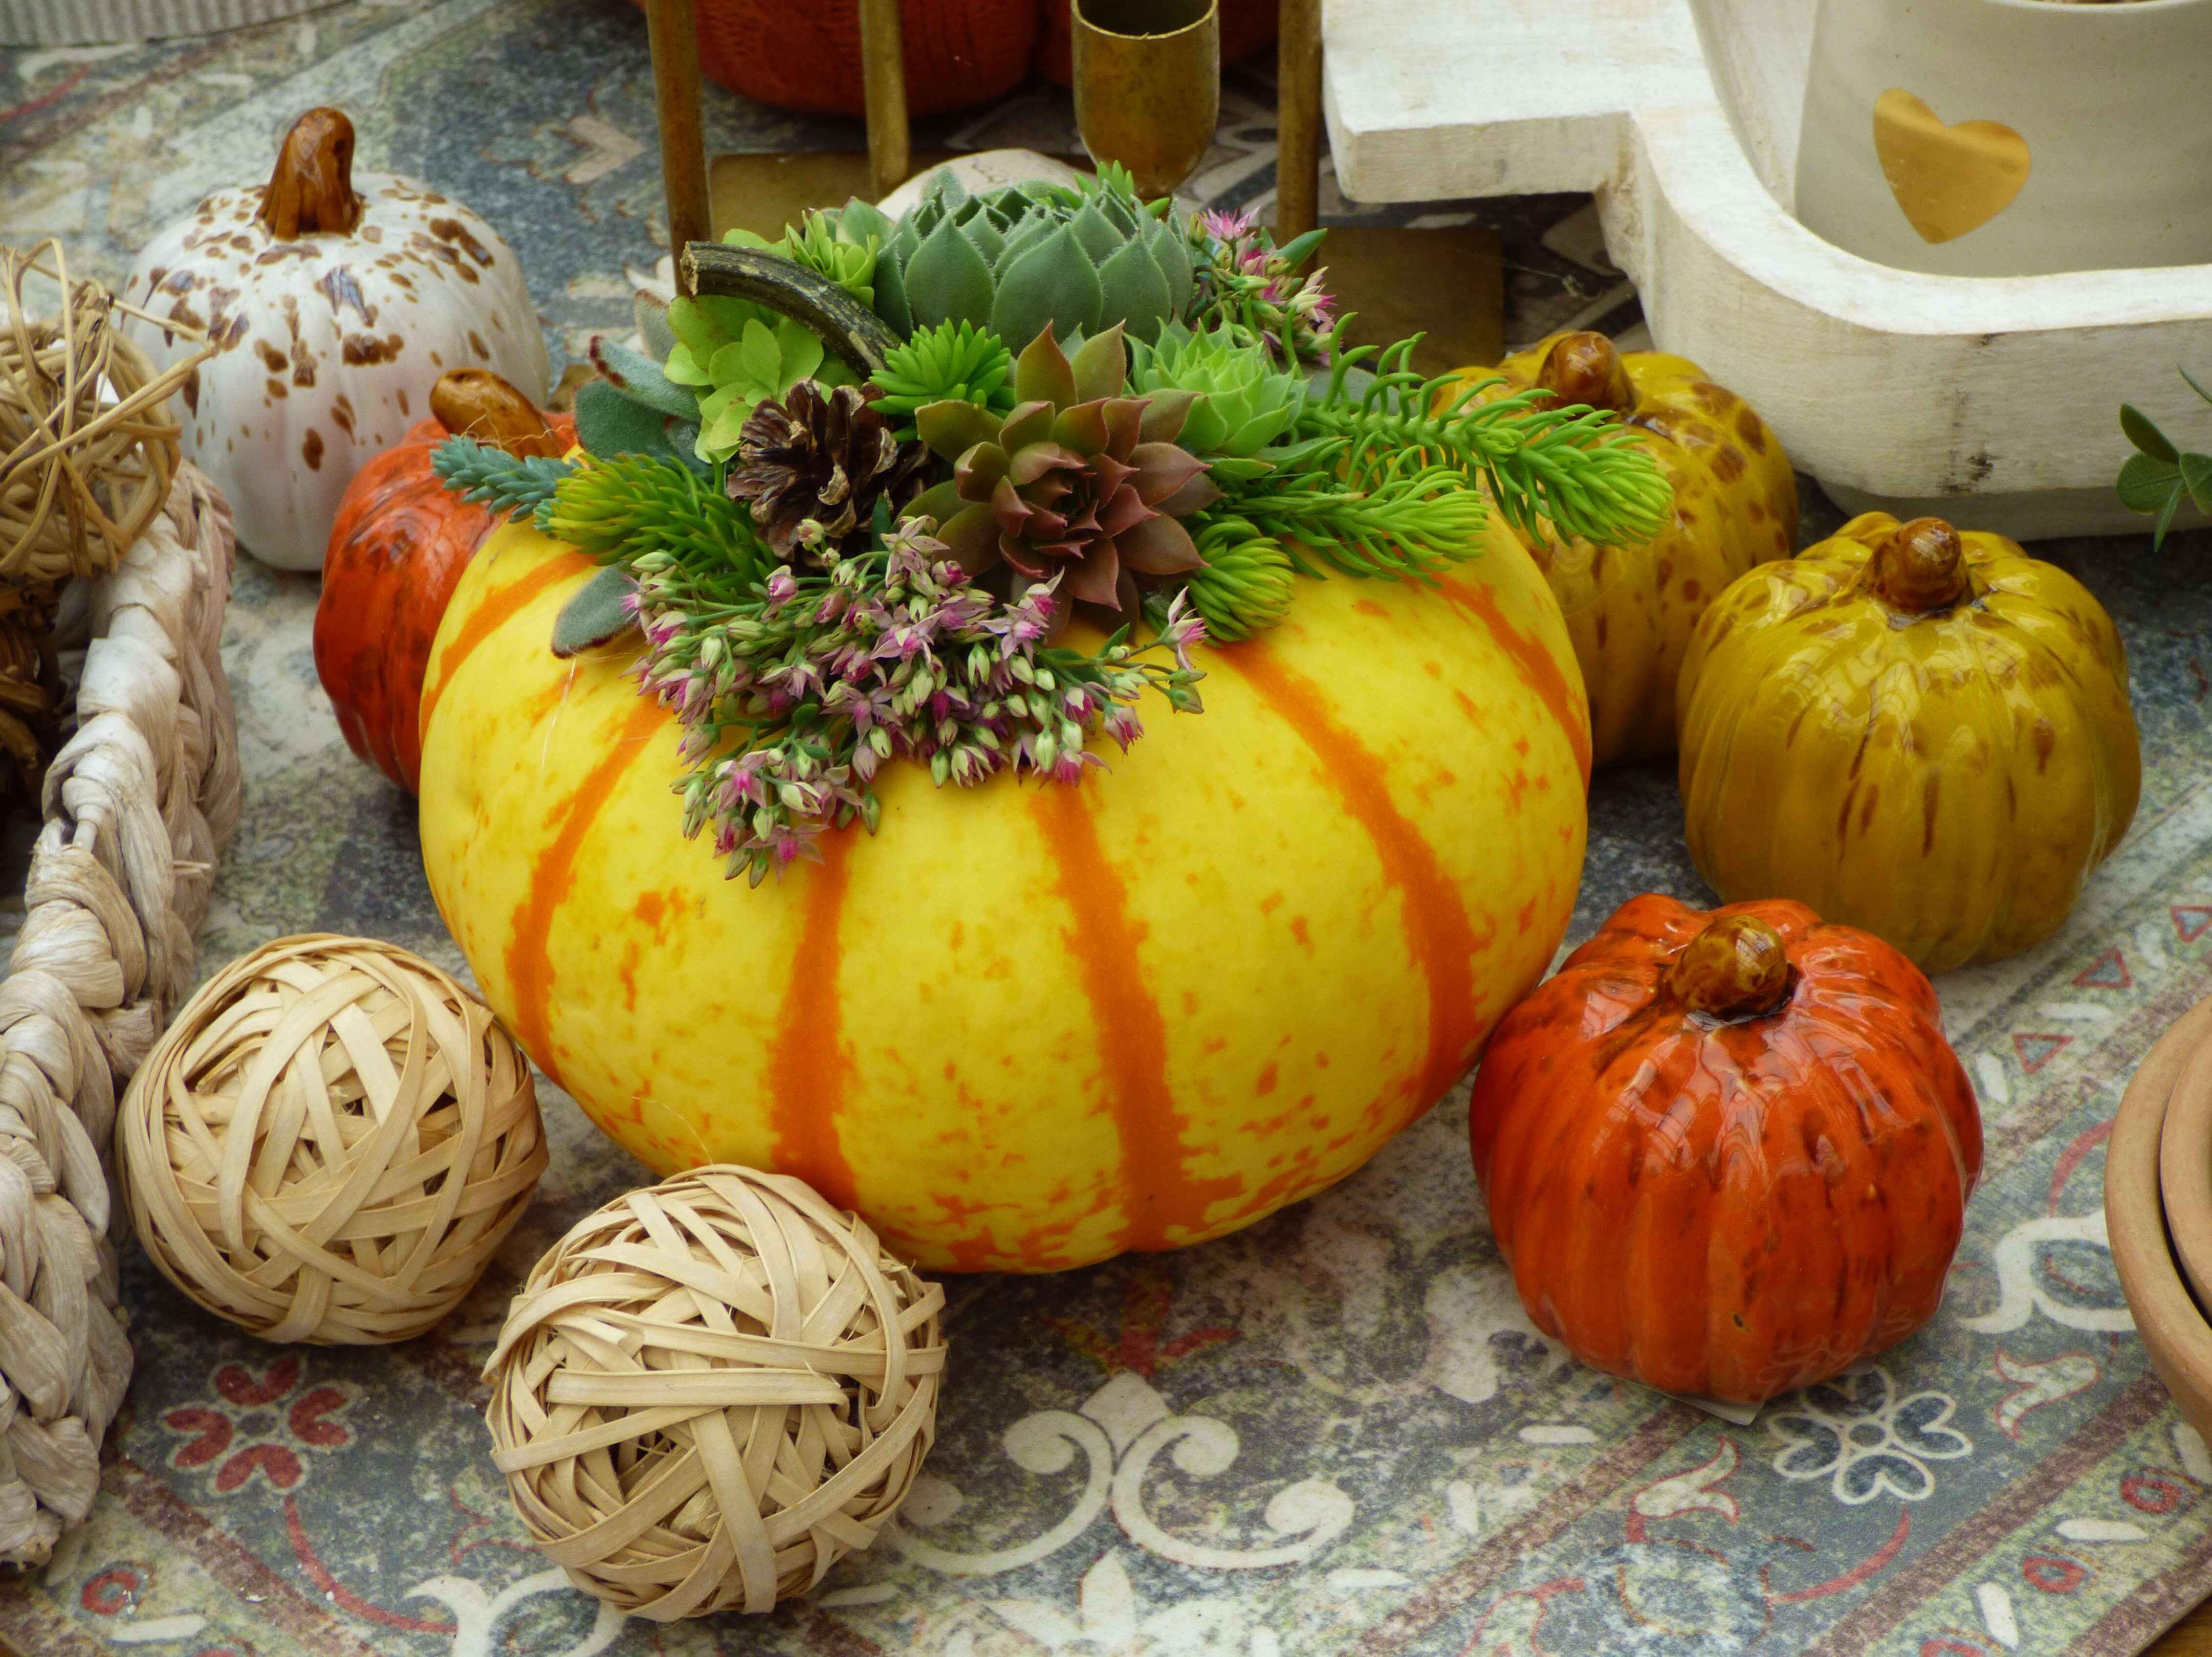
This top view of the finished display shows us that Teresa has tied both sides together with bronze Graptosedum and some green Sedum, both of which complement the adjacent clusters. Again, the display should engage your interest from all sides, as these DIY succulent pumpkins tend to be used as table centrepieces.
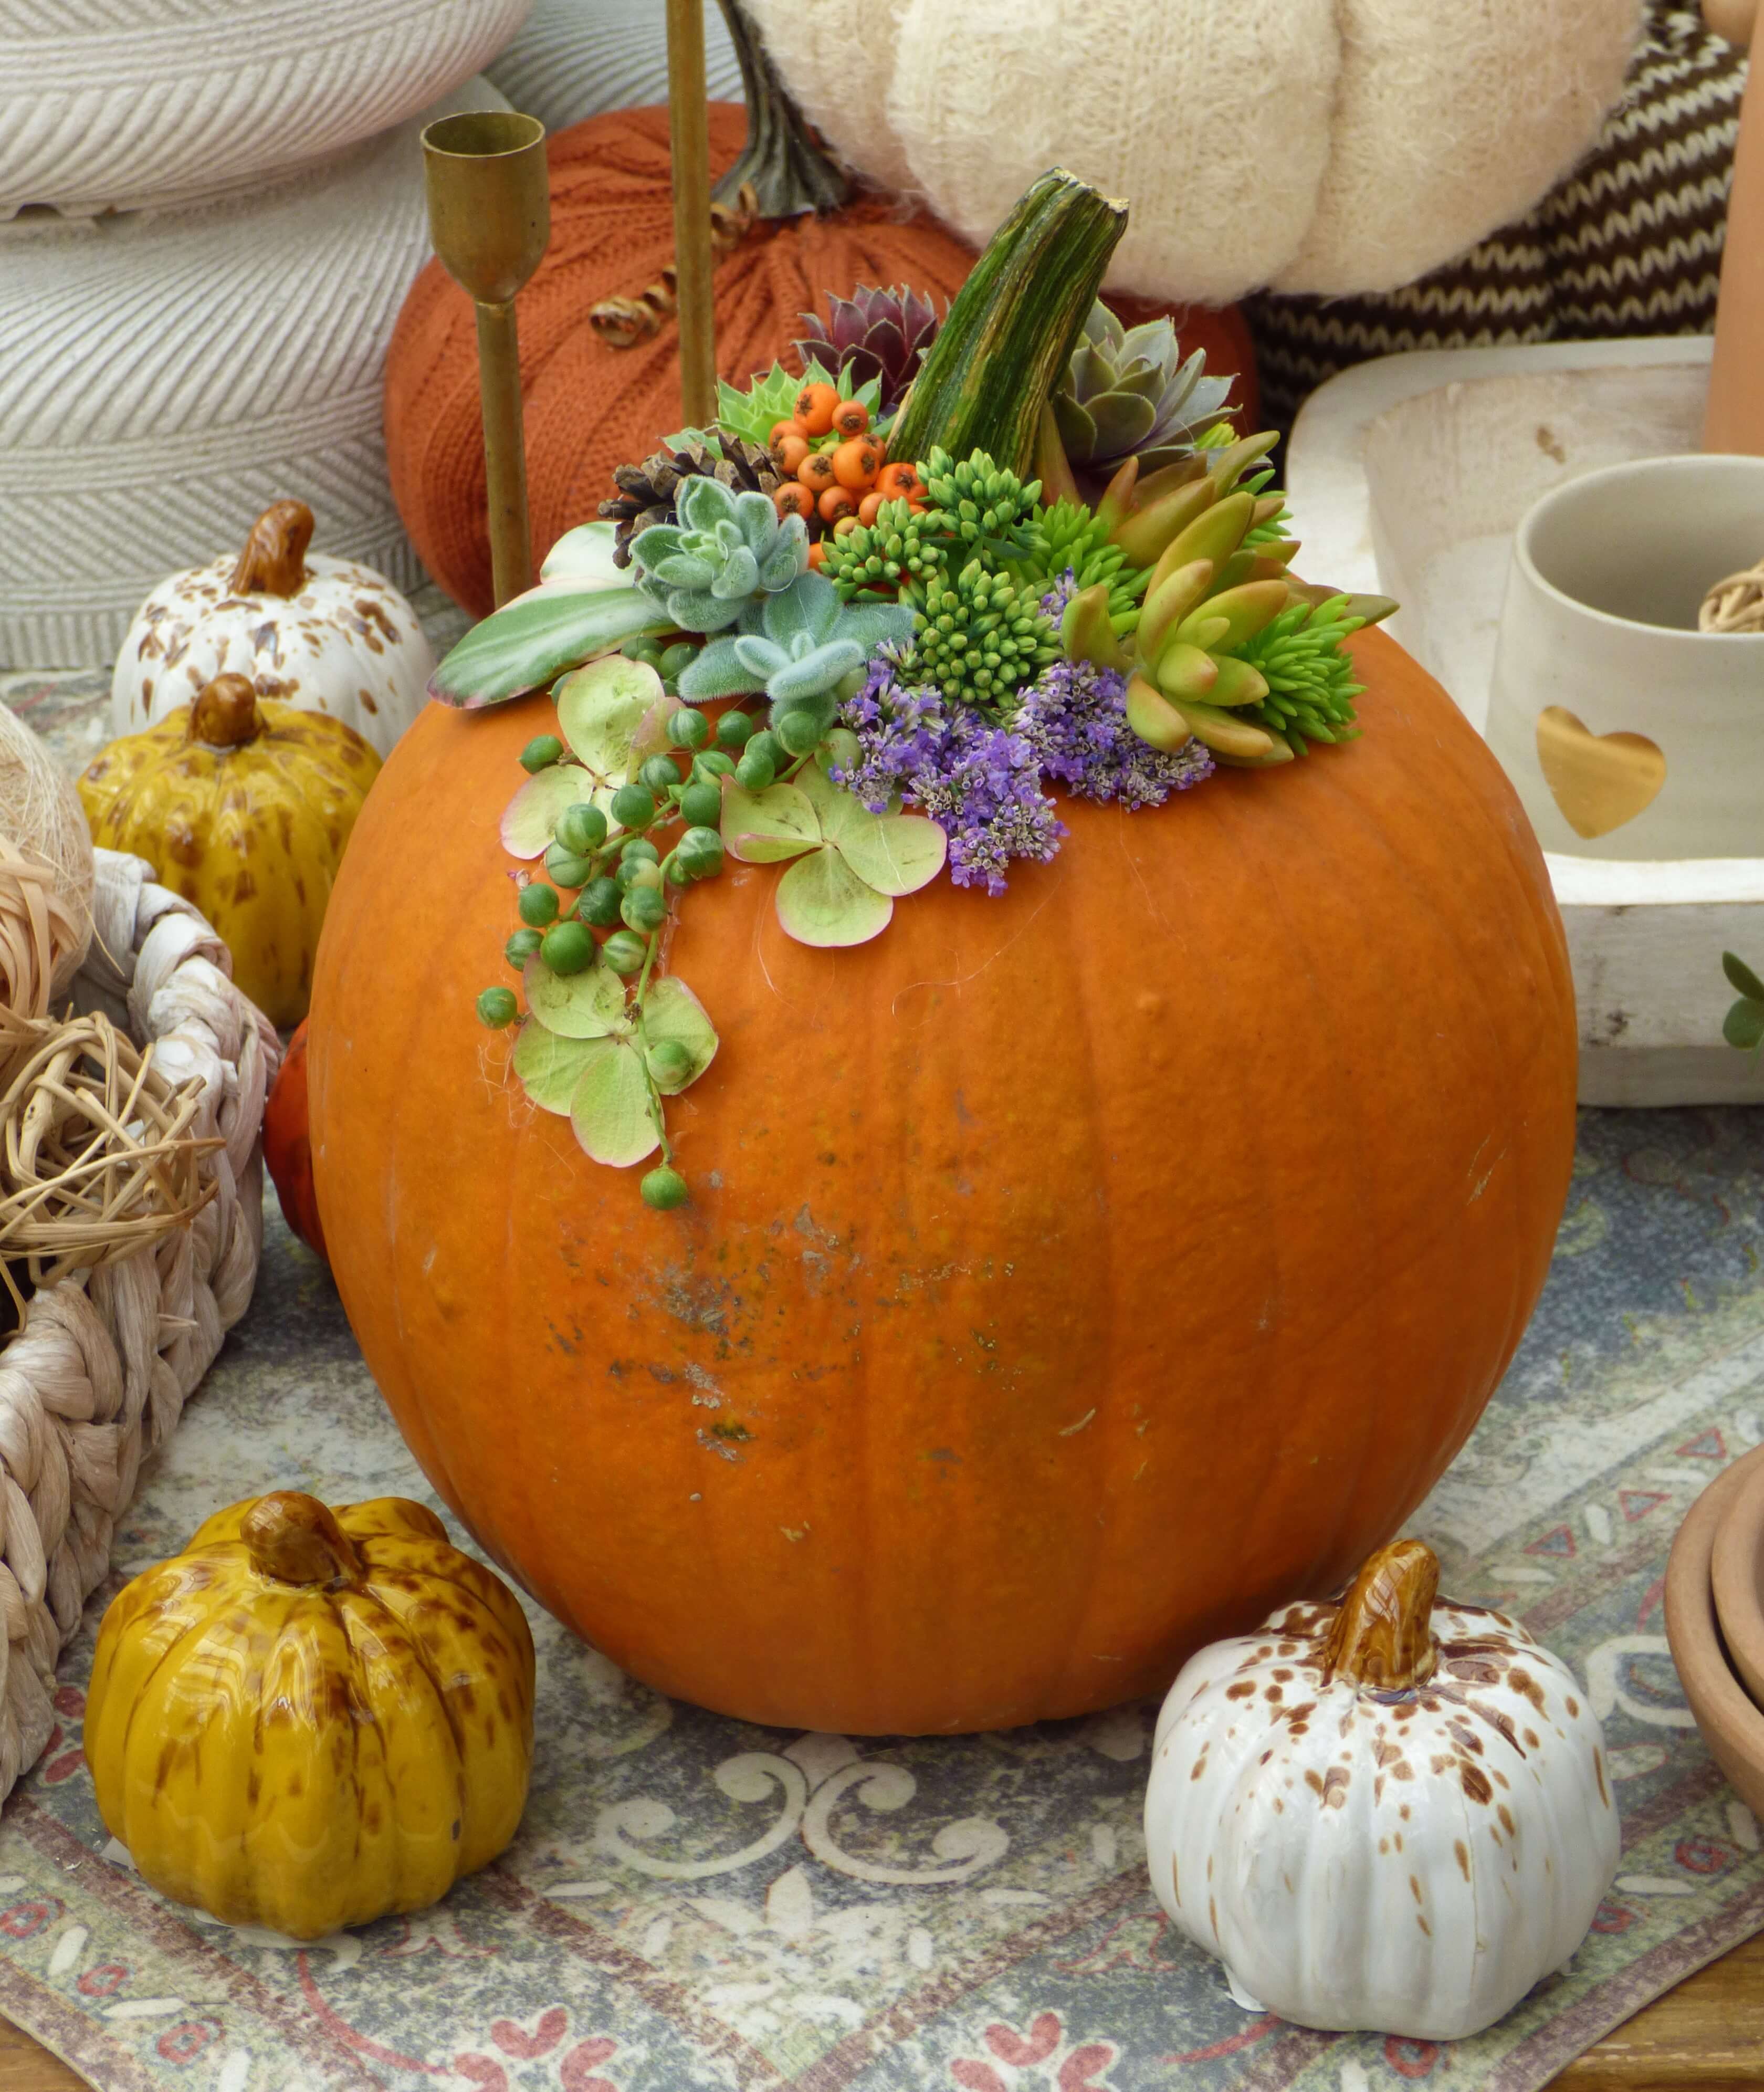
Step 8: Adjust Your Palette When Using Different Coloured Pumpkins
As you can see from the four other examples that Teresa created, you need to change your colours based on the type of pumpkin you use. Purple, rose, and green just pop on the yellow sample, while silvers, sage green, and a hint of Statice give the white pumpkin its classic charm. So, always have plenty of applique décor on hand because even if you don’t use them, they can just be thrown into the compost afterward.
A Final Word on Care for Your Succulent Pumpkin Centrepiece
Teresa suggests a light misting every three days to keep the arrangement looking fresh, that way you should get many weeks of enjoyment out of it.
If you are feeling a little crafty, remember that Amsterdam Greenhouses and Garden Centre has every colour of pumpkin just waiting for you to transform them into the star of the autumn season.